A fantastic DIY Bathroom renovation project! Check it out!
Advertisement
The bathroom is one of the rooms in a house that gets ruined more quickly, not only because of the frequency of its use but also because it is exposed to continuous moisture when we take a shower or a hot bath.
At the same time, the bathroom is also the most expensive room to be restored, especially if you have one in as bad condition as the one in this video.
Yet with the right help, a bit of work and a very small economic investment, this bathroom has been completely transformed --- from being old and dingy it has become very cool and trendy!
via Better Homes and Gardens | Youtube
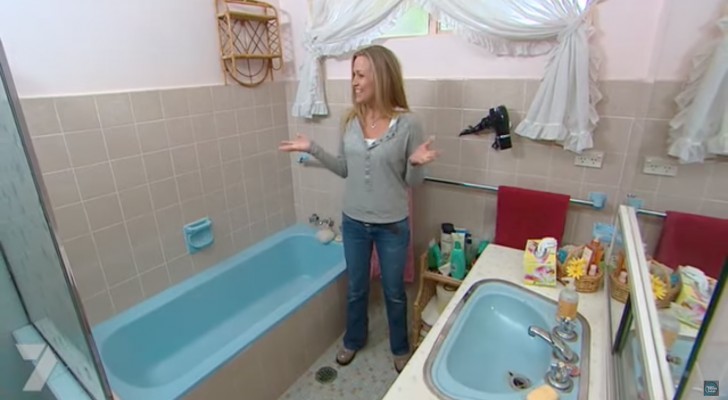
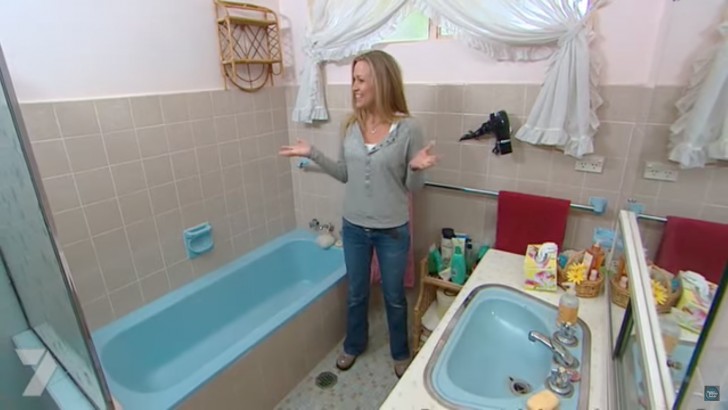
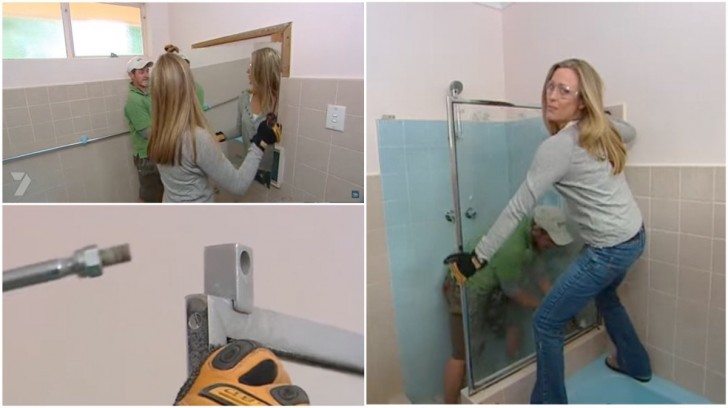
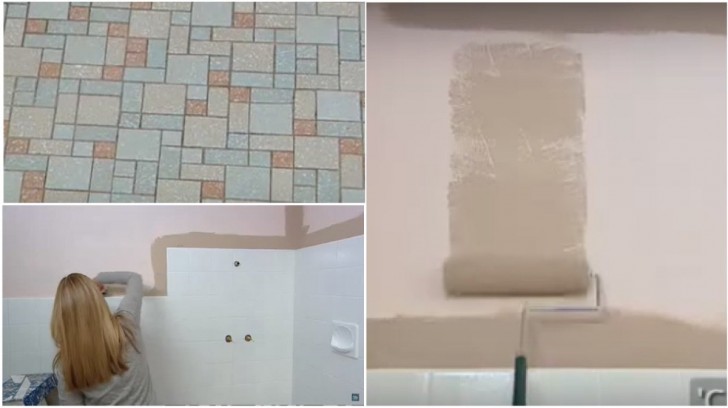
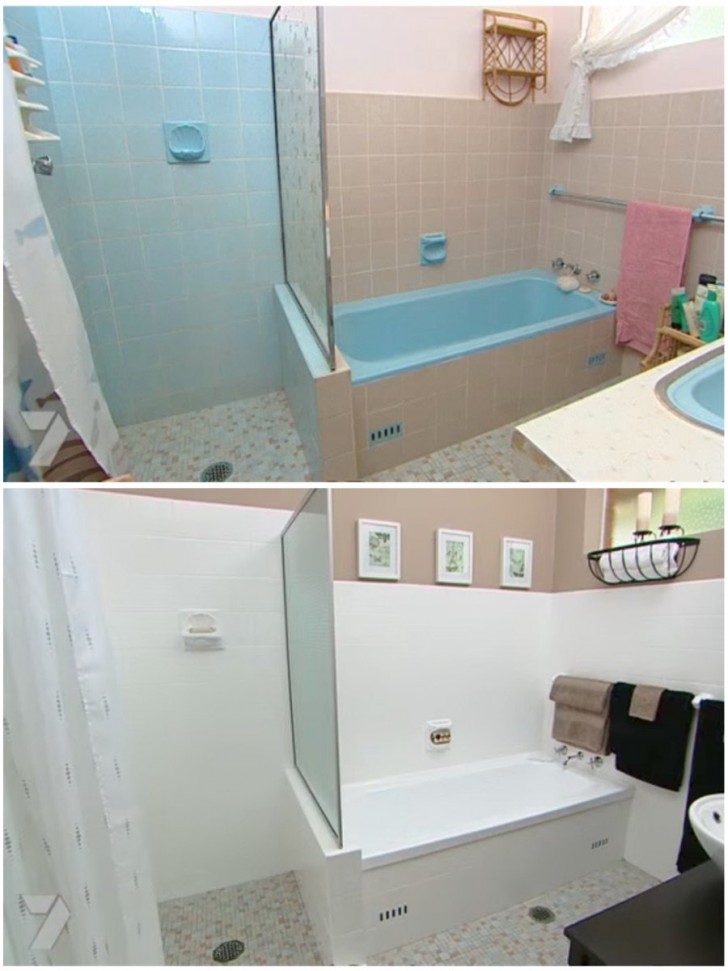
This was the initial situation, but contrary to what you might think, it only took a few repairs, second-hand furniture, and some paint ...
Advertisement
The first thing was to understand which parts of the bathroom were reusable and which could now be considered to have had their day.
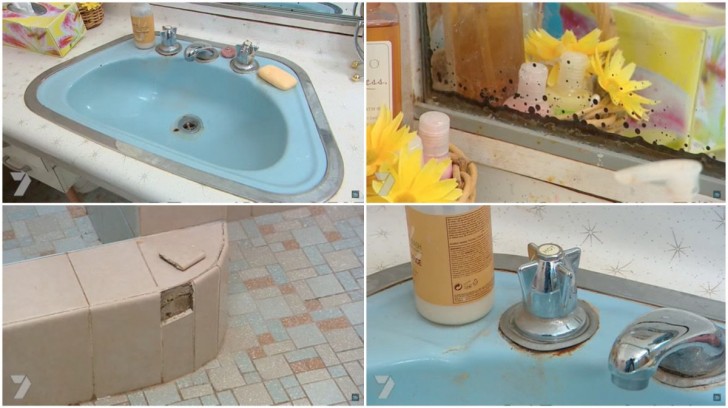
Once she had identified what should remain and what should not, then she got rid of the superfluous.
Once the bathroom was "naked" she noticed some broken tiles that she immediately glued together.
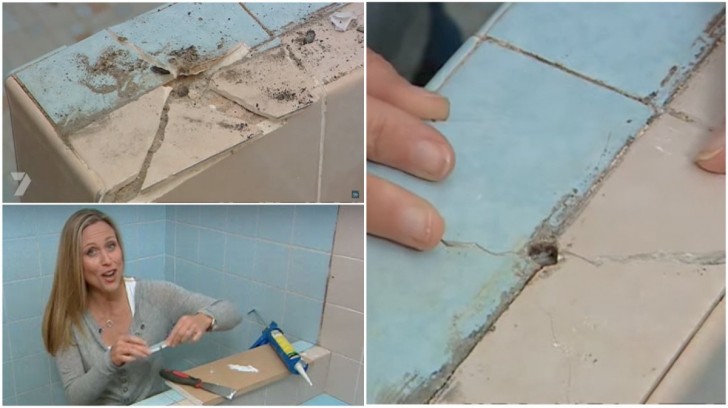
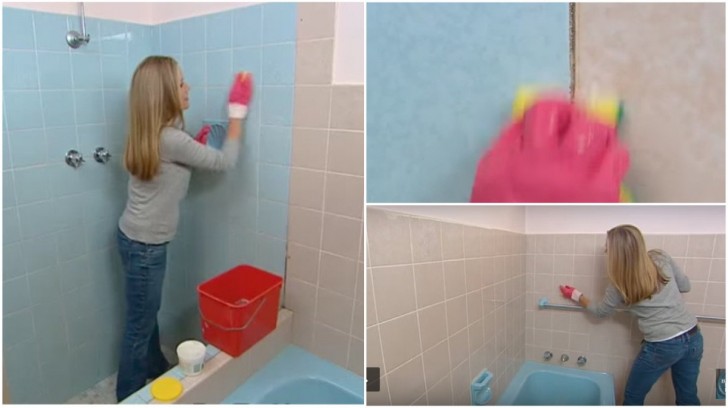
Once the glue was dry, it was time for cleaning. Each tile was cleaned and polished with particular attention to the corners and joints.
Advertisement
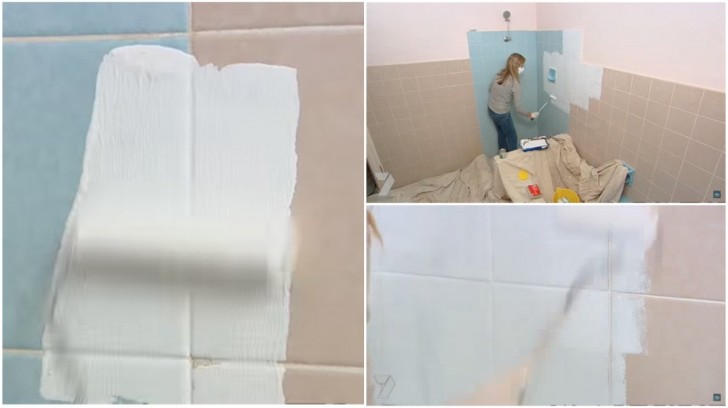
When the tiles were completely dry, she applied white porcelain paint.
It was then time to re-paint the plaster walls, therefore a tonal color coordinated with the colors in the floor tiles was chosen.
Advertisement
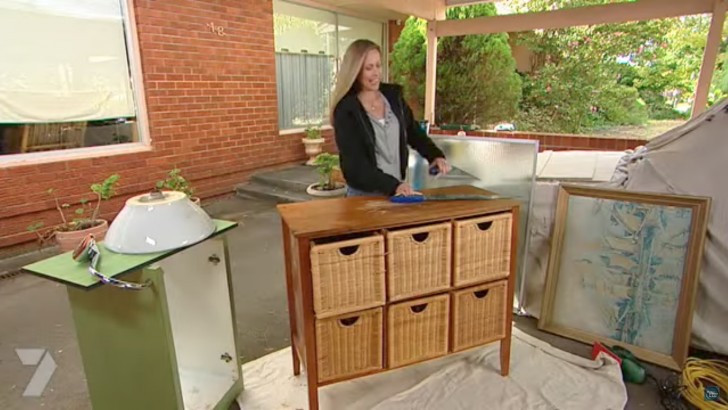
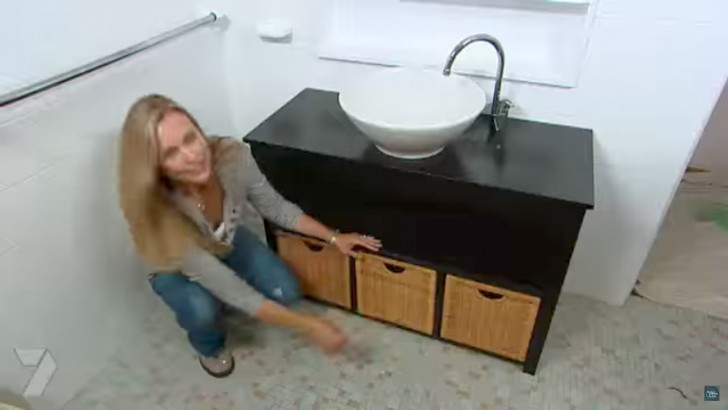
Finally, the moment to acquire the bathroom furnishings had arrived and given the low initial budget, a trip to a flea market was the ideal solution.
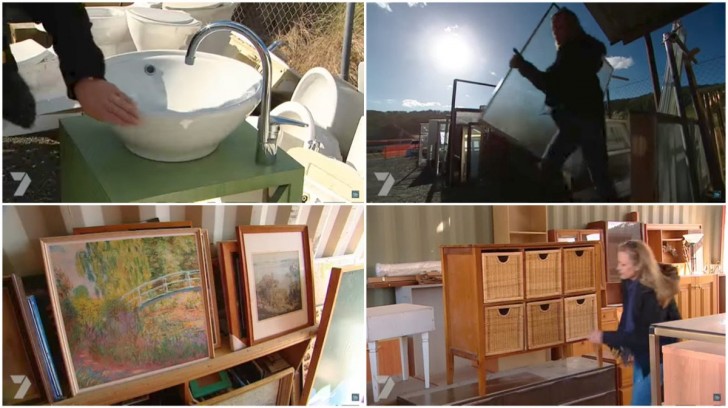
Several very specific furnishing items were chosen that could later be adjusted and modified.
Advertisement
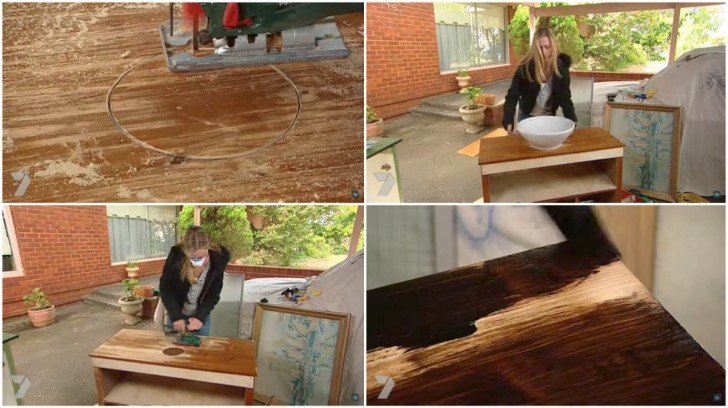
An opening was made in the bathroom vanity cabinet to allow for passing the water pipes and then it was painted.
Not a bad result, right? Right!
Advertisement
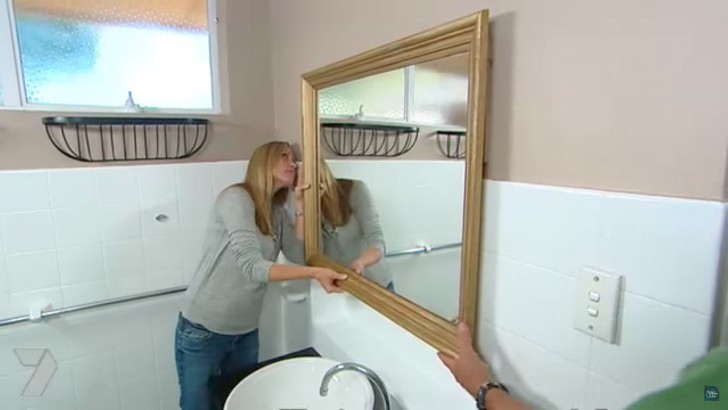
For the old mirror instead, a golden frame was chosen.
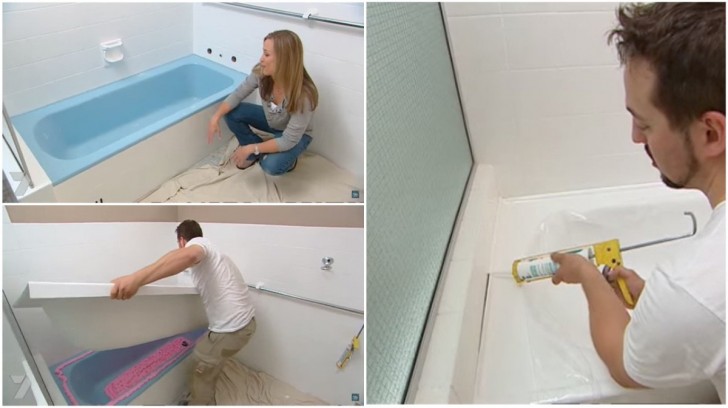
It was then the moment to renovate the bathtub and the answer was to simply use a bathtub insert and seal the edges with silicone.
Advertisement
After adding a few bathroom shelves, the result was remarkable.
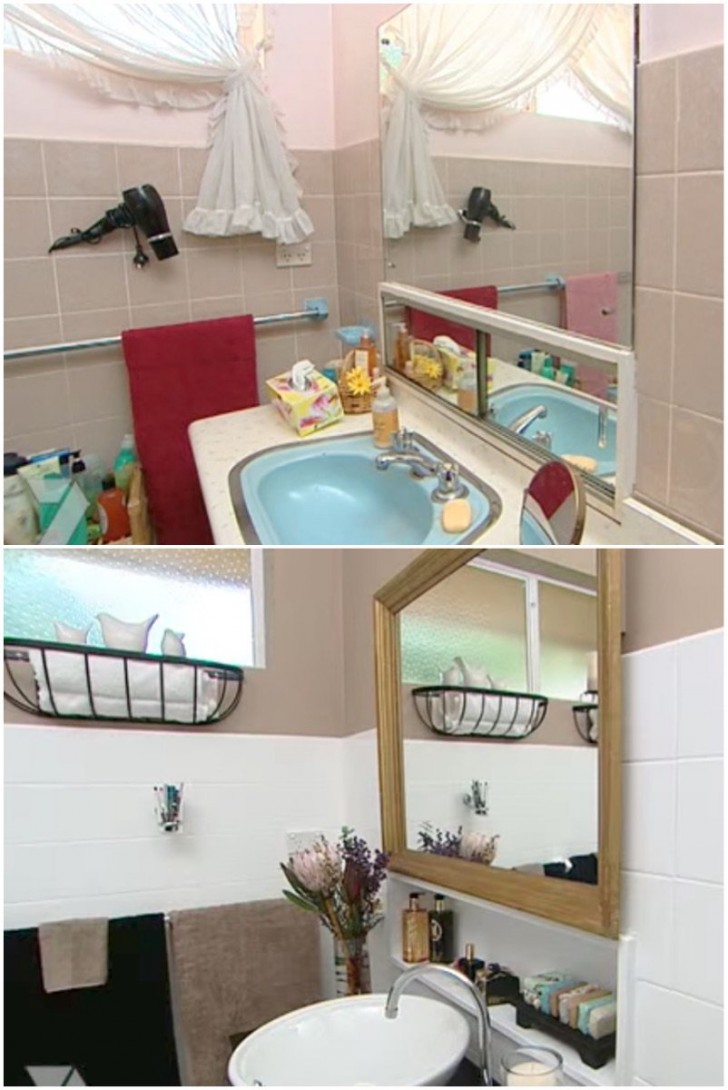
A completely new bathroom at a very low cost!
In the video, you can follow all the steps for this fantastic upcycling project....which is actually a small miracle!
Advertisement