Make a tree branch coat rack! A very practical DIY project!
Advertisement
If you have a chance to get a few branches, we recommend that you try this simple DIY project, which has a guaranteed positive result.
You do however need a minimum of manual skill, so if it is necessary you can always ask someone for help.
Following this article, you will learn how to build a natural coat rack, created by using some tree branches By the way, I recommend that you do not cut them directly from trees and that you use broken or fallen branches.
Ok! Let's see how to proceed!
Here is the material you need:
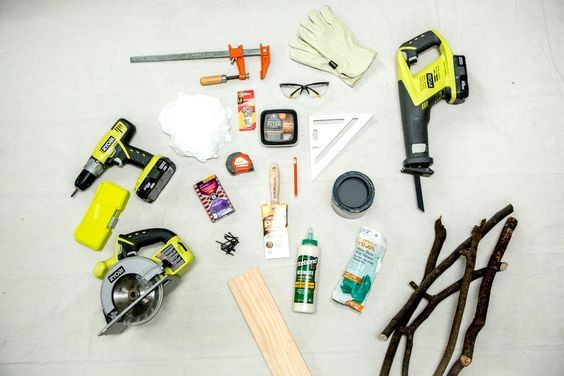
- 4 wooden slats two 40 cm (16 in) and two 70 cm (27.5 in)
- drill and tips
- clamps
- screws
- wood glue
- saw
- sand paper
- paint for wood and a paint brush
- 6-10 tree branches
- personal safety devices (gloves, protective glasses ...)
Advertisement
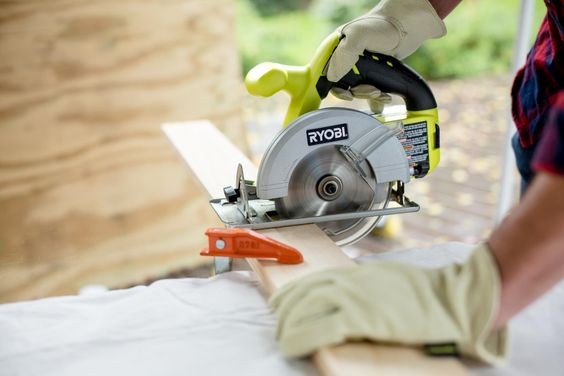
If the slats are longer than necessary, mark the correct measurements and then proceed to cut off the excess length.
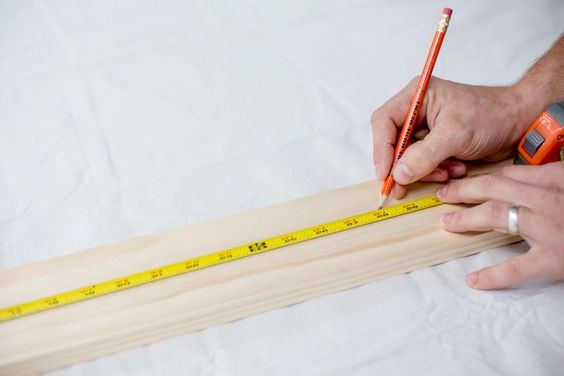
You can use any type of saw to cut the slats.
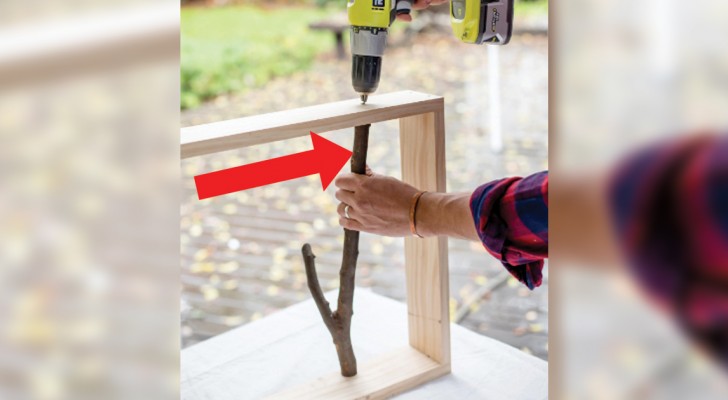
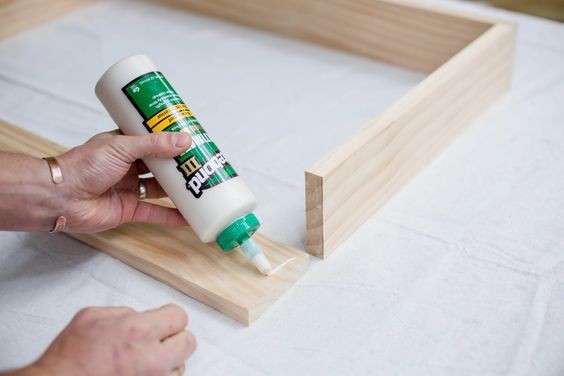
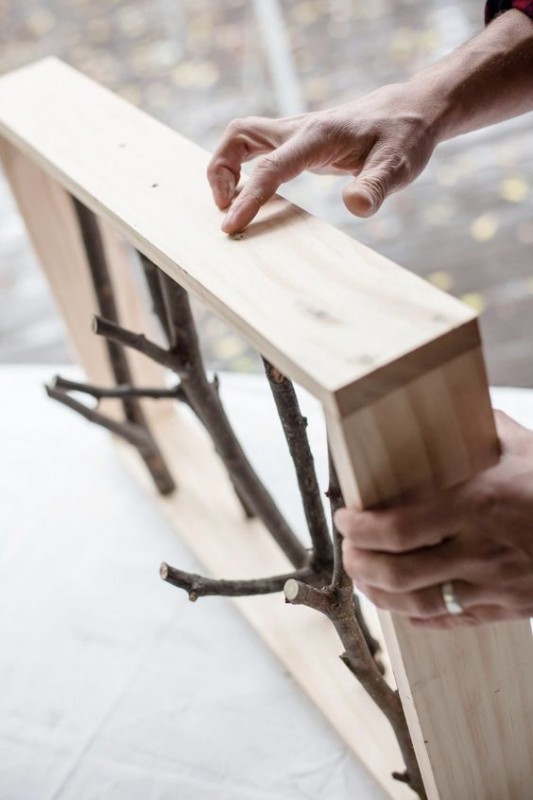
Nail the slats together to form a frame but first of all, make two holes at the top.
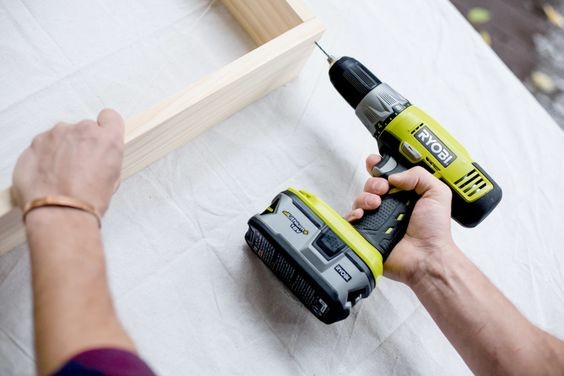
Use wood glue to hold the two parts firmly together and then insert the screws into the holes.
Advertisement
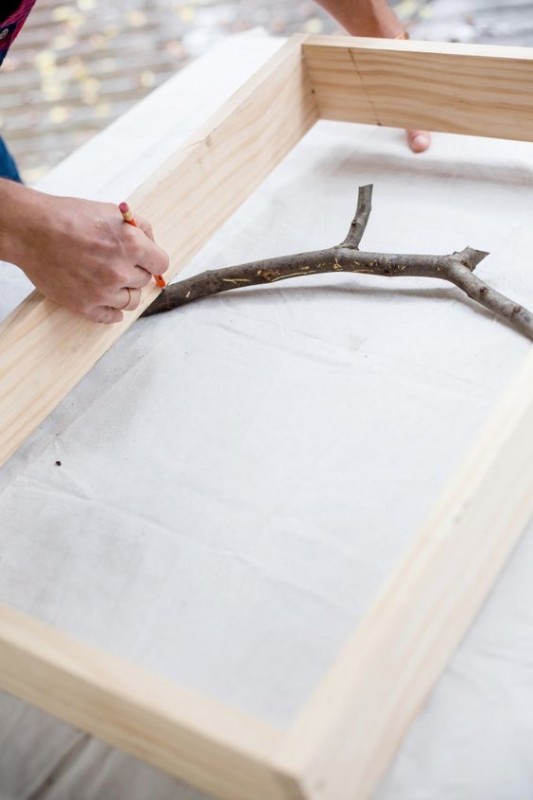
Find the right size for the branches.
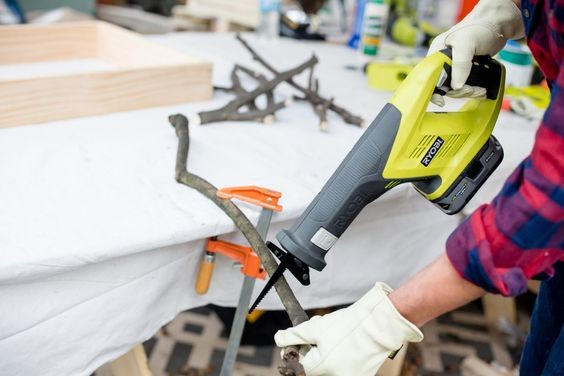
Cut the excess from the branches.
Advertisement
Fix the branches inside the frame by first drilling a hole and finish by inserting a screw.
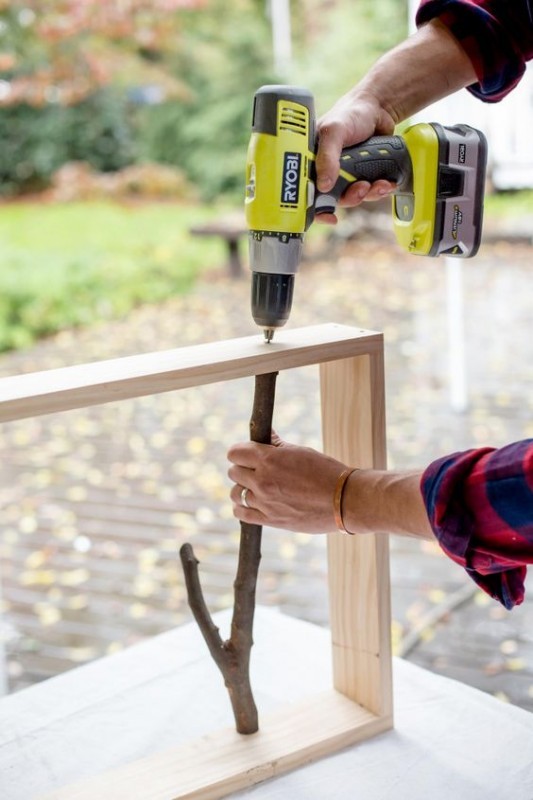
For a result that has a finished look, place some wood filler on the screws.
Advertisement
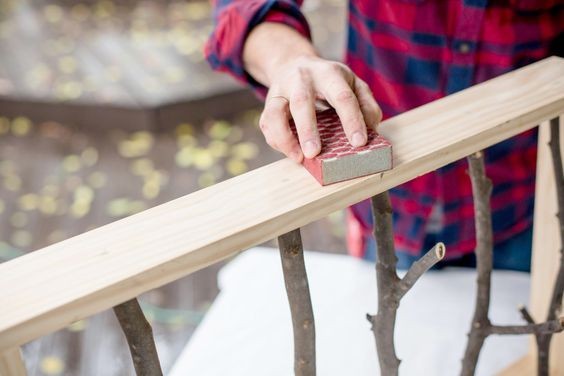
Let dry, then smooth the wooden surfaces with 220-grit sandpaper and remove the wood dust with a dry cloth.
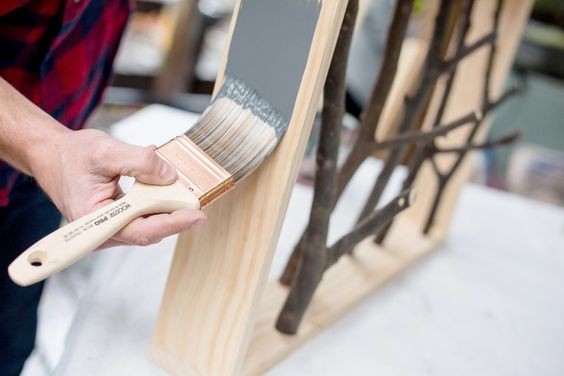
Paint the coat rank any color that you like.
Advertisement
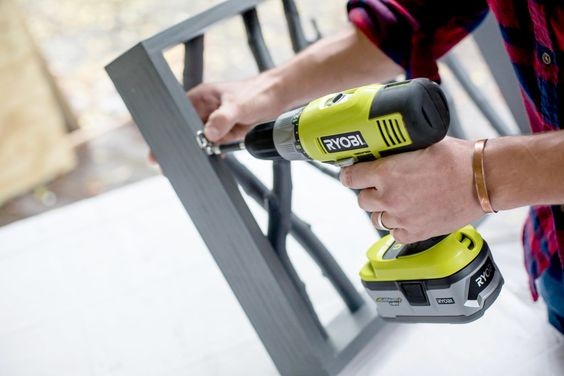
Attach two hooks on the back of the coat rack.
Now, you can hang the coat rack inside your house! Pretty cool, right?!

Here in the video, is another way to create this coat rack! The procedure is a little different but the result is equally pleasing!
Advertisement